


They certainly are not the best covers available but they are cheap.
Text, photos and video by Tom Hintz
Posted– 12-1-2015
The tail feathers on our planes are essential for a long, fun life of the plane. However, the design of those tail feathers makes it difficult to transport the plane without suffering what many call “hangar rash” even though it actually happens in the car or trailer. The importance of these surfaces makes it worth the effort to keep them in good shape.
Another reason I love tail feather covers is that they hold the control surfaces in a neutral position which can make loading and unloading the plane without incurring damage much easier. I had been fighting with my Aeroworks 50cc Edge 540 while putting it in the trailer because the rudder would deflect to one side forcing the horizontal stab/elevator to bump down the wall as I slide the plane into its transport position. After I made a set of tail feather covers like the ones described in this story putting my giant scale Aeroworks 50cc Edge 540 into the trailer is lots easier and I am not scraping the end of the elevator against the trailer wall while doing it.
I used the same insulation material sold under the Reflectix brand name that we used in the “Making Wing Bags” how to story on FlyingRC.net. A roll 24”-wide by 25-foot long cost me about $25. (11-30-2015) Depending on the size of your plane you might need to use one of the wider rolls of Reflectix material.
Because this material is “quilted” with trapped bubbles of air in the Mylar-like plastic (about ¼”-thick) we need to pop all those air pockets in a path a bit over ¾”-wide along all sewn edges. Top Flite makes a tool called the Woodpecker that is meant for perforating sheeted structures before covering but it also kills a nice width of bubbles in this insulation just as well. The Woodpecker costs like $16 and might be a good thing to have if you do covering anyway.
To better finish the sewn edges I added a binding tape that makes for a cleaner looking and much tougher edge. The edging I used is 7/8”-wide double fold bias quilt binding tape from a fabric store.
To start making the panels I use one somewhat oversized piece of Reflectix and trace the outline of the surface with a marker. Then I add roughly ¾” to all of the sewn edges and cut that piece out. I can then use that piece as a pattern for the others needed. In the case of the horizontal stabilizers there are four pieces. Many planes have elevator linkages near the fuselage so I cut the covers to fit up to but not over the linkage. We don’t need to make these more complicated than they need be.
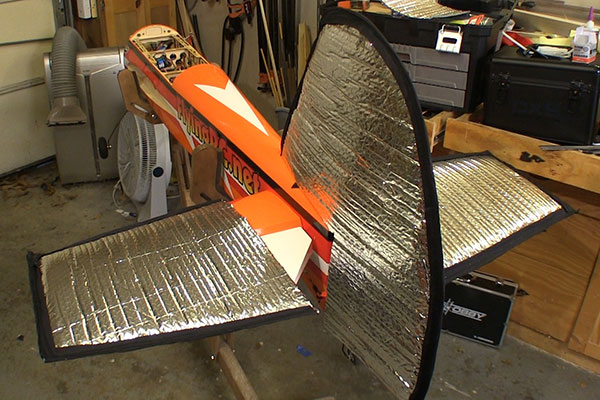
In the video and photos for this story I made covers for the tail feathers on my RedwingRC 50cc YAK 55. I wanted to extend the cover down near the lower edge of the rudder so making the first piece (pattern) took some cutting and fitting. After I was satisfied with how the cover matched up to the rudder I traced it and cut the matching piece.
With all of the needed panels cut I used the Woodpecker tool to murder all of the air pockets around the sewn edges in a path roughly ¾ to 1” wide along the edge. This part of the process is much more important than it might seem. Trying to sew the Reflectix with the air pockets intact is only advisable if you are intent on hating yourself. If you do manage to sew the edge the stitches will be loose and the tail feather covers will fall apart. With the edges “Woodpeckered” we can sew the pieces together more easily though it still requires keeping the pieces aligned and feeding them through the machine accurately.
After sewing the panels together, I test the fit them on the plane just to be sure. There is actually a good bit of stretch or distortion in this material that lets the pieces conform to the surfaces being covered. However, if there is a problem we want to know about it now before applying the edging tape which makes alterations far more difficult.
Though applying the edging is actually very straight forward it is clumsy feeling due to the slickness and bulk of the Reflectix and all those still inflated air pockets just outside of the sewing line. I have found that sewing the tape a few inches at a time lets me hold the tape in place more accurately.
Most sewing machines let you choose from three needle positions, left, center and right. For the first pass when attaching the binding tape, I use the left needle position. This insures that if we are holding the binding tape in place the stitching will get a good bite on the sewn edge under that tape.
After going all the way around the sewn edges with the needle in the left position I make a final pass around the binding tape with the needle in the center position. I’m not sure the assembly actually needs the second line of stitching but it certainly is not hurting anything. Besides, that final pass is the easiest of all of the sewing we do on these wing covers.
Making these tail feather covers is a cheap and easy way to protect the damage-prone control surfaces whenever the plane is being transported or stored.
Equally important to me is how these covers hold the control surfaces relatively straight which makes rolling the plane into the trailer of into a car easier to do without snagging an elevator or the rudder on something on the way in.With all of the violent things I do with my planes in the air I want to protect them as much as I can during transport. These covers can prevent some covering and other damage to the tail feathers which can make the plane available for flying more as well.
You can also make wing bags out of the Reflectix material and I have a story on making those – Click Here
Have a comment on this story? –Email Me!