


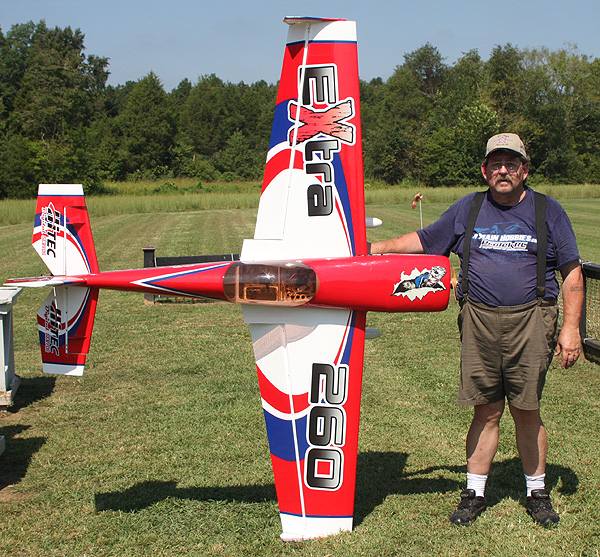
Text, photos and video by Tom Hintz
Flight video by Clark Ponthier
Posted - 9-9-2014
When I began looking for a giant scale project Aeroworks planes came highly recommended by a few local fliers including one who specified the Aeroworks 60cc Freestyle Extra 260 QB-L (QB-L = Quick Build-Light Series) which put it at the top of my list. I have no illusions of me being a full-on 3D pilot but I do enjoy my 1-1/2D flying style/capabilities that include throwing a plane around in the sky on a more limited (say safer) level. The Aeroworks 60cc Freestyle Extra 260 QB-L seemed to meet all of my needs with lots of capability left over.
The Aeroworks 60cc Freestyle Extra 260 QB-L in this review also cost a bit less than I thought because it was on sale. Plus, Aeroworks says they held the price down a bit by leaving some things out of the kit that a lot of builders did not use. Things like the fuel tank, filler dot, throw meter and Velcro straps were left out to let us use what we wanted. I was suspicious, as I always am when a company explains a lower price but in this case I have to agree with Aeroworks intentions. The one point I was not totally behind was leaving the SFG’s (side force generators) out of the kit. I think they are a part of what makes the Aeroworks 60cc Freestyle Extra 260 QB-L what it is but I can see others liking a cleaner look. We will all survive and the Aeroworks 60cc Freestyle Extra 260 QB-L remains a very cool airplane with a more than reasonable price tag.
While I am talking about what they left out I should note what they still include. The airframe is very light, very strong and very straight. The covering is attractive and applied perfectly and despite being delivered in 90-degree-plus heat it had surprisingly few wrinkles. The inevitable wrinkles that did develop came out easily with a covering iron on medium heat. In the kit you will find carbon fiber wing and stab tubes, aluminum main landing gear and tail wheel along with very stout double truss compound control horns on all surfaces. They also supply heavy duty ball links that mount on real turnbuckle style (and equally heavy duty) control rods that make precise setup a breeze. You also get a nice selection of drilling templates for several very popular engines.
Aeroworks adds their C.G. Buddy to the kit that makes this critical adjustment (center of gravity) absolutely simple. I can’t stress how important this one little device is on any plane big or small. You don’t have to build a CG jig or try to balance such a large plane on your thumbs. Getting the C.G. Buddy in the box is a big deal that you will appreciate when you are able to get the CG right the first time. Other manufacturers may be kicking themselves for not thinking of this very cool little device.
The Aeroworks 60cc Freestyle Extra 260 QB-L has a wing span of 91 inches and a wing area of 1592 sq. in. The fuselage is 82.5” long from rudder to the tip of the spinner. The cowl is 10”- wide and Aeroworks recommends a 3.5"- diameter spinner. The projected all up weight is 17.5 to 18.5 pounds which seems very light for this size of airplane.
Aeroworks specifies engine size as 50cc to 60cc so naturally I went with a DLE 61cc engine. I hear that the DLE 60cc twin has been successfully used in this plane as have engines in the 70cc to 85cc sizes but I am not personally familiar with any of those efforts, the compromises that had to be made or the flight performance.
The Aeroworks 60cc Freestyle Extra 260 QB-L uses the modern laser cut, jig built construction that produces remarkably tough, straight airframes. The tail feathers are all airfoil shaped and the two-piece horizontal stab is designed to be removable for transport. The main wings and horizontal stabs are both strengthened by carbon fiber tubes.
The Aeroworks 60cc Freestyle Extra 260 QB-L comes with formed aluminum main landing gear and an aluminum tail wheel support but carbon fiber versions are available separately. A surprising option is the Side Force Generators (SFG’s) that so many associate with the Freestyle moniker. The SFG’s are easy to install after assembly and cost $49.95 (8-14-2014)
You get an impressive (SAE) hardware package with the Aeroworks 60cc Freestyle Extra 260 QB-L. The control surfaces use pin style hinges that are very strong and free-working when installed correctly but you have to do the gluing of the hinges. Aeroworks skipped that labor-intensive step to help keep the price low. All of those control surfaces are double beveled so you can achieve true 3D throw wildness if you so desire.
My Aeroworks 60cc Freestyle Extra 260 QB-L arrived a day early and the double box packaging did its job. Everything emerged in perfect condition and I had everything I was supposed to have. The instruction manual is on a CD but it is well done and well-illustrated.
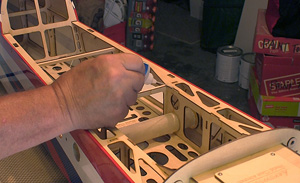
First up is installing the pin hinges. I have a whole story on this task at “Installing Pin Hinges” in the How To section of this site. The short course is that we fold the pin hinges as far as they will go and dip the ball joint in melted Vaseline to protect that from epoxy. Then I epoxy one side of each hinge into the airframe, lift the free leg to vertical and use a small square to be sure it is 90-degrees to the airframe surface. I let these hinges set up while I installed the control horns in the control surfaces. By the time those have set up I can put epoxy on the exposed sides of the pin hinges, slide the control surfaces onto them and tape them in place just to be sure they do not sag back while the epoxy is setting up.
I was still waiting for the rest of my main servos so skipped ahead to putting the Aeroworks 60cc Freestyle Extra 260 QB-L up on wheels, sort of. I did install the tail wheel assembly but only put on the main gear legs. Without the wheels the plane says put better on the bench while I am installing the engine and related stuff which I did next.
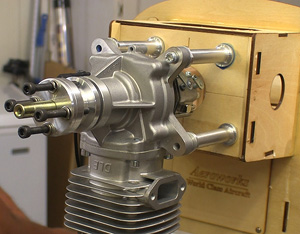
The DLE-61cc Gas Engine I am using on this plane has the same mount pattern as the DA55RE template provided in the kit. The firewall has laser burned alignment marks that match the marks on the template so you just match up the lines, tape the template down and drill the holes. The access cover screwed to the top of the motor box comes off to make installing the engine itself and the throttle servo way easier. After I bolted the DLE-61cc Gas Engine up with the stand offs that came with it I measured from the firewall to the flange that the prop rests against and found that it was 6-3/4” but the spec is 6-7/8”. This could cause an interference problem with the cowl which is pre-drilled at the correct length. I added two washers at each stand off and that put the engine at 6-7/8” right on the button.
I also mounted the HiTec HS-485HB throttle servo to the inside wall of the motor box. That location allows for a short, rigid linkage with no-play ball joints on both ends. I realize that I am a 1-1/2D pilot on a good day so the last thing I need is a sloppy throttle or a busted linkage at a bad moment.
At this point, I decided to install the B & E Graphix package. Applying the side and tail graphics is easier without the horizontal stab installed so got this step out of the way. I have to say that I was once again impressed with the B & E Graphix and dressing the plane up spurred me on to get it finished.
For all control surfaces I used HiTec HS-7954SH High Voltage Ultra Torque servos. These servos feature coreless motors, dual ball bearings and have a swing speed of 0.12 seconds on 7.4V or 0.15-seconds on 6.0V. Torque generated is (6.0V/7.4V): 333 / 403 oz./in. The weight of these powerful servos is only 2.3 ounces in a 1.57” by 0.78” by 1.45” package. The Aeroworks 60cc Freestyle Extra 260 QB-L uses one servo per aileron, one for the pull-pull rudder and one for each elevator half.
I was a little surprised that the HiTec HS-7954SH servos dropped right into all of the in the pre made openings. In the past I had to file the openings a bit to get the recommended servos in their openings. The elevator servos on the Aeroworks 60cc Freestyle Extra 260 QB-L fit inside of the horizontal stabilizer halves and demonstrate another great use for the Micro Fasteners #STW0209 #2 by 9/16” socket head screws recommended in the manual. Being able to put these screws on the hex wrench and drive them in place without a pilot hole eliminates the need for a long drill bit to reach down into the stab to where the servo mounts.
The instructions call for 1-1/2” servo arms for the elevators and ailerons and the rudder needs a 3” double arm for the pull-pull system. I used Hangar 9 aluminum arms that feature a socket head hold down screw as well as socket head cross bolts that clamp the arm onto the servo spline for additional security. Remember that we have 400-inch-ounce servos driving very large surfaces so saving a few bucks on cheaper servo arms is way less than smart.
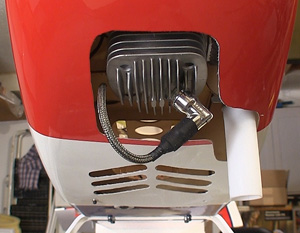
Aeroworks includes a piece of card stock and instructions for using it to make a template for the cowl cutout. Following the instructions I had the template made and the base cutout transferred to the cowl in less than half an hour. Using a rotary tool I made the opening to match the template. To actually get the cowl over the engine and exhaust I had to elongate the exhaust cutout a bit and tweaked the opening around the engine head to make a generously sized opening that would let more air out of the cowl to help cooling.
Aeroworks also provides templates for making cooling slots and a chevron layout for larger openings that increases the amount of air flowing out of the cowl. Remember that letting air out is just as important as letting air into a cowl. The Aeroworks 60cc Freestyle Extra 260 QB-L has a large oblong intake surrounding the prop so I am hoping the cutout for the engine and the air slots behind that will pass enough air to keep the engine cool. The only way to know that is get the plane in the air and pay attention to engine temperature.
The Aeroworks 60cc Freestyle Extra 260 QB-L comes set up for canister exhaust with extensive air openings along the bottom but covered over. If you use the canister or not Aeroworks suggests opening these slots to further aid in engine cooling.
Checking the CG on a plane this big is important but tough to do using thumbs or bench mount type devices, especially by yourself. The Aeroworks 60cc Freestyle Extra 260 QB-L comes with a pair of fittings that go between the wing and fuse on both sides, hooked over the carbon fiber wing spar that let you loop a cord over each side, right at the CF point and simply lift the plane off of the ground. Aeroworks designed the CG Buddy to be sure you are checking the CG at the precise point every time. This is the kind of thing that should come in every airplane kit or ARF. When I checked my Aeroworks 60cc Freestyle Extra 260 QB-L I found that it hung slightly tail down so I left it as is.
I put the RX/servo batteries forward under the tank compartment. While I was working under there I installed the Sullivan Skywriter pump. The gas and smoke tanks were next including their lines and fill dots. With everything installed except for the smoke pump battery I rechecked the CG and it had remained slightly tail down so I left it alone. The plane was checked dry (no fuel or smoke fluid) as the instructions say.
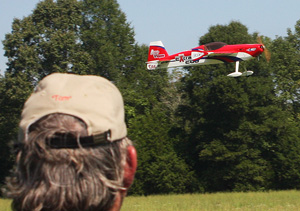
I wish all of my maiden flights were as simple as when I took the Aeroworks 60cc Freestyle Extra 260 QB-L up for the first time. A couple clicks of down and two clicks of right aileron and it flew straight and level. It also had (and still has) a very slight downward arc when on a 45-degree up line, inverted or upright. I have had to add a click or two of trim on very hot days but the handling of the Aeroworks 60cc Freestyle Extra 260 QB-L has remained rock solid.
I set full rates up using my “all I can get” theory. For midrange I reduced everything roughly 50% and for low rates took everything down to about half of the reduced rates. The ailerons on the Aeroworks 60cc Freestyle Extra 260 QB-L are huge and I wanted to be able to tame this plane down if it proved to be too touchy when I got it in the air. I did try the reduced and low rates and sometimes use reduced for landings but for nearly all of the 20 flights have been done on the “all I can get” rates with 60% expo and feel great to me. The instructions give you specs for setting the throws so pay attention there if you are unsure of what you want in this plane. The factory spec is a good starting point and you can tweak those settings as you get familiar with this tremendous plane.
The Aeroworks 60cc Freestyle Extra 260 QB-L is so good I began searching for something bad about it but as of this writing with well over 40 flights on it I can find no evils. I wasn’t over joyed about having to glue the hinges in place and having to buy the side force generators separately didn’t give me the warm fuzzies but that is it. Everything else about the Aeroworks 60cc Freestyle Extra 260 QB-L is a home run and makes the small deficiencies (to me) pale by comparison. The $699 (9-8-2015) price tag for a giant scale airplane is also a big plus.
The Aeroworks 60cc Freestyle Extra 260 QB-L has the widest flight envelope of any plane I have flown. It can be totally docile or a pure animal in the sky depending on your desires, dual rates and expo settings. Snap rolls are tight and quick as is the knife edge spin. Tumbles look more like a 40-size 3D plane than 91” of wing rotating way faster than would seem possible. And all of this with the CG dead center, no scary tail heavy condition is necessary. And the CG Buddy that Aeroworks supplies with the plane is pure genius and makes checking the CG easy and dead-on accurate.
Video Tour |
|---|
The Aeroworks 60cc Freestyle Extra 260 QB-L is a great airplane with great flying characteristics. You don’t have to be a full-on 3D pilot to fly it but it will handle whatever 3D you want to throw it into. Takeoff and landing even in gusty winds in the 20 to 25-mph range have been surprisingly easy for me to handle. If you are looking for a first giant scale or one that is fully capable and a joy to fly you need to put the Aeroworks 60cc Freestyle Extra 260 QB-L at the top of your must-see list.
See the AeroWorks product page – Click Here
Have a comment on this review? –Email Me!