


Text, photos and video by Tom Hintz
Flight video by G Jawhar
Posted - 2-3-2015
Aluminum main landing gear on our planes is great for absorbing the bumps of the occasional hard landing. However, those “exuberant” landings can bend and twist the gear, putting the wheels out of alignment with each other. Wheels out of alignment with each other can cause a plane to feel like it is steering to one side during takeoffs and landings.
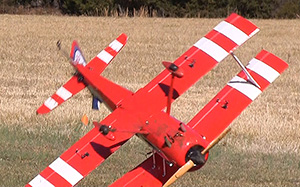
I partially flattened the aluminum gear on my Aeroworks 50cc Pitts Python ARF-QB recently when a dead stick left me in a field near the runway. I did bend the gear back to what looked like their original shape but never checked the alignment of the wheels. They were close but toed out just a little. When I landed the 17-pound Pitts on a mushy, rain-soaked grass runway the wheels sunk in a bit and the slightly toed out condition got a bunch worse all at once and my fancy Pitts tripped, smacked its nose in the mud and flipping onto the top wing and rudder. We even caught it on video and my “warts and all” theory of journalism meant you get to see it in the accompanying video.
I lucked out and the damage was very minor and easily fixed. The flip also pointed out my error in not checking the wheel alignment when repairing the landing gear after the dead stick. I used to check this alignment after every incident when I flew RC 25 years ago and this incident helped me remember it. The good news is that this time around I will check the alignment and will show you an easy way to get this right the first time – as I should have.
I know lots of people eye ball this kind of thing and may even get away with it. When it is my money up there I shy away from the “getting away with it” theory. I’ll take the extra few minutes to get it right even if I don’t remember that until after another incident….
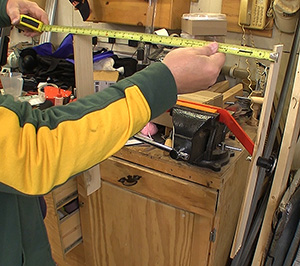
First, remove the landing gear from the plane. Nothing good comes from trying to re bend aluminum gear on the plane. There is however a great chance of compromising the mounting blocks in the fuselage which can be a disaster waiting to happen later. Even giant scale wheels are too small to accurately measure the amount of toe in we want so I remove them, the wheel pants and the axles. Then we can use “cheaters” to make the alignment process way easier.
My “cheaters” are nothing more than a pair of 20”-long boards, ¼”-thick and 2”-wide. Anything close will work just fine. I drill a ¼”-diameter hole at the center and use a finger knob and wing nut to attach them at the axle holes. The “cheaters” simply extend the surface of the landing gear where the wheels mount so we can see the difference more easily. Nothing fancy here but they work very well.
The first thing to do is measure from the bend at the mounting surface to the opposite leg end. Do this on both sides to see if the legs are bent equally. Usually they are not, especially if the plane has been flown much. If one side is different I always bend the longer side in to match the shorter one. There is nothing to gain by bending the gear out but lots of benefit to closing them up slightly.
We actually want to toe the wheels in a little bit on two lines – one straight up and down and the other front to back. When the plane settles down on the wheels the gear naturally want to spread a little under the weight. If the wheels are toed in a little at the bottom we stand a much better chance of the wheels being squarer to the ground with the load applied. On my 17-pound Aeroworks 50cc Pitts Python ARF-QB I toe the bottom of the wheels in about 3/4” as measured at the ends of my 20” alignment boards.
To get the legs even I will bend one side in to get about 3/8” of toe in at the bottom, then bend the other leg in to hit my ¾”. You may find that more or less toe on the up and down line works better for you but I will bet that it will be close to ¾” measured on the ends of the boards.
Next I turn the boards flat (like the ground) and check to see if they are toed in at the front, also by about ¾” measured at the end of the boards. Make sure that you have the landing gear in a vise or something and you know which is the back and which is the front. There is usually a small taper on the back of the legs so make sure you have this the right way.
Before putting the gear back on the plane check your work as it is way easier to make a little correction now than when everything has been out back on. When happy with the measurements put it all back together and go flying. If you had a problem of the wheels spreading out on landing or takeoff the plane should now feel freer with less of a tendency to nose over like you hit the brakes. You are also likely to notice that the plane tracks straighter now on takeoff and rolling out after landing.
Have a comment on this story? –Email Me!